Load testing is very important for gauging website, web application, and API performance during normal, heavy, or even sudden traffic spikes. This post will help to understand load testing using Docker containers with Continuous Integration (CI) tools. The Docker approach to load test applications enables sharing the tests between users and replicating the test environment easily using Docker containers. We will briefly explain what Docker is and using Docker containers and tools used to load test applications via CI.
What is Docker?
Docker! You might have heard this fascinating word among your team or read in technology blogs and it also might sound intimidating at first place. Docker is a containerization platform which packages your app source code and all the dependency packages together in a form called a Docker container. It makes sure the application runs in any environment without thinking about the overhead of operating system or system configurations. Isn’t this cool!
Moreover, Docker is a popular tool which makes it very easy to build, deploy and run applications using containers. Due to this, our application can run anywhere with having the same behavior. And the important thing, Docker is open source.
What is a Docker Container?
A Docker container is a lightweight, standalone, executable package of software that includes everything which an application needs: codebase, system libraries, system tools and settings. A container wraps up the code and its dependencies together which helps the application to run quickly and reliably from one environment to another.
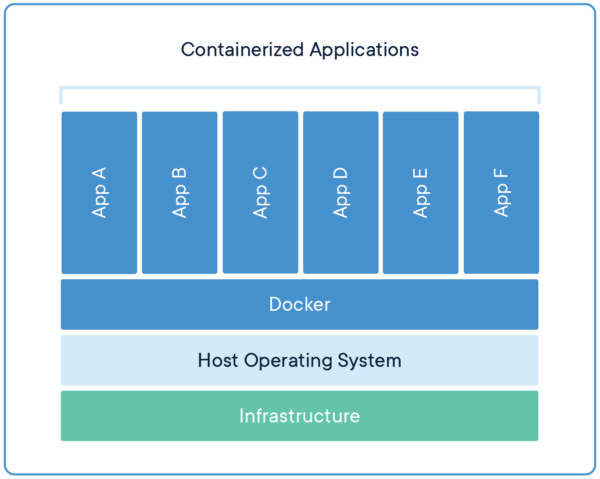
Image: Containerized Applications
With Docker, developers can focus on writing code without worrying about the system on which application runs, this makes the application portable. The way an application runs on your local machine would be as close or same to production.
Key Features of Docker
- Easily scalable. Due to the lightweight containers, docker containers can spin up in seconds and can easily scale.
- Increases productivity. It eases technical overhead for application development, environment setup. Moreover, it helps to execute the application in an isolated environment and reduces use of resources.
- Application isolation. Each application runs independent to each other and runs applications in isolation.
- Reduced infrastructure and maintenance costs. It helps supporting existing platforms to be moved to Docker easily, which runs in an automated manner hence reducing maintenance costs.
- Swarm. Swarm is a clustering and scheduling tool for Docker containers. It allows the user to manage multiple containers deployed across multiple host machines.
- Routing mesh. It helps in way of routing and balancing the traffic to the containers.
Benefits of Docker
- Docker enables application portability.
- Docker enables faster development release cycles.
- It shines with microservice architecture.
- Docker provides an isolation environment for applications.
- Docker enables faster and easy horizontal scaling of applications.
- It enables efficient use of resources.
Docker Inside CI Tools
The biggest benefit with Docker is we do not tend to worry about dependency conflicts. For example, if we want to build one project with Golang 1.11 and one project with Golang 1.12 version, Docker can help to segregate this and create images for both and even run both in parallel on different container with no conflicts, which would not be possible doing on a server. The images cooked with different versions can be saved to registry and can be used as part of continuous integration tools like Jenkins.
Jenkins provides support in this case, where it picks available Docker images built for performance test or integration test and overhead for cooking Docker images from scratch is saved. Docker layer caching saves a lot of time here. As part of our CI pipeline, we need to create a Docker image for a performance test and this image can be run using CI to carry out a performance test of application. We can even automate this step, with every feature addition or change, we can run a performance test to benchmark and safeguard performance impact due to recent changes.
Limitations of Using Docker for Performance Tests
While Docker has many advantages, it has couple of limitations while doing performance test:
- When we run a heavy load test simulation using multiple Docker containers on the same machine, it can consume a lot of CPU of the running server, which can affect our test results.
- Performance testing report via Docker lacks enough application details.
- We may need to fine tune host OS and containers where performance tests are running.
- As Docker containers are disposable, it may lead to loss of report.
To save us from all these limitations, we can use a solution like LoadView, which can be easily integrated with Jenkins, to assist with automating the performance testing process.
LoadView Load Test Integration with Jenkins
Whenever we test any application, we test if it’s functionally working as expected. If that works, we mark the application’s functionality is working fine. But in the real world, the same application is used by hundreds, or even thousands of users, which can bring its own complications. It is crucial to know that your application can stand up to the expected traffic demands, especially if it is critical for generating revenue.
Obviously, not all applications are tied to generating revenue, but regardless, the user experience is still a huge factor for getting visitors from the online door to the online checkout counter. If at any time during that process their experience is slow, lagging, or just plain confusing, they will lose interest immediately. They do not care that the reason their experience is bad is because there are thousands of other users on your site or application at the same time. As far they know, they think they are the only one using your application. Hard to believe, but it’s true. Just like the real world, they must wait in lines like everyone else sometimes. Just make sure their wait is seamless, enjoyable, and not too long.
We need to validate whether our application can handle such traffic. So, with every change or new feature development, we can run load or stress tests on the application via our LoadView plugin which can be integrated with Jenkins.
We will now look at the steps involved to run load tests via the Jenkins integration with LoadView:
- Before we start using a LoadView Load Test Scenario to test your build in Jenkins, we need to have a Test Scenario on LoadView, where we can add a list of APIs which needs to be stress tested.
- To start integration with Jenkins, we need a LoadView Unique identifier to use as LoadView Security token.
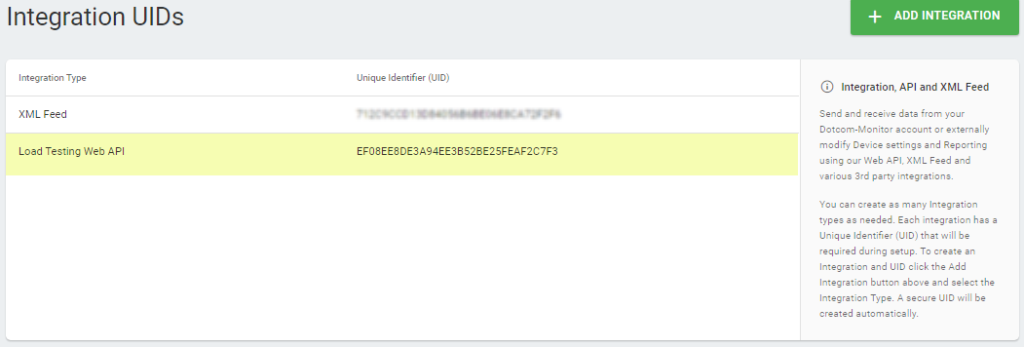
- In LoadView, create an integration UID under Account > Integrations > Add Integration > Load Testing Web API. Copy this integration UID.
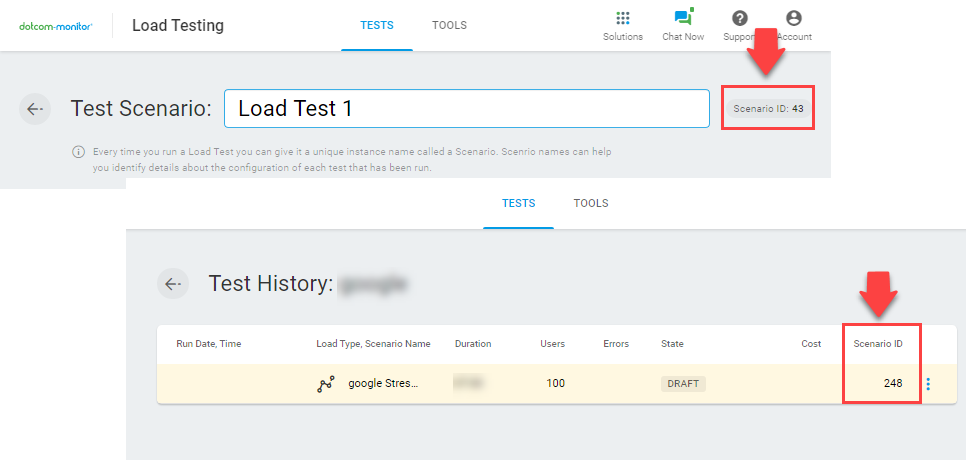
- To set the stress test, we would need Test Scenario Id. The Scenario ID can be found on the scenario setup page as shown below.
Configuring LoadView Plugin in Jenkins
- Log into your Jenkins account.
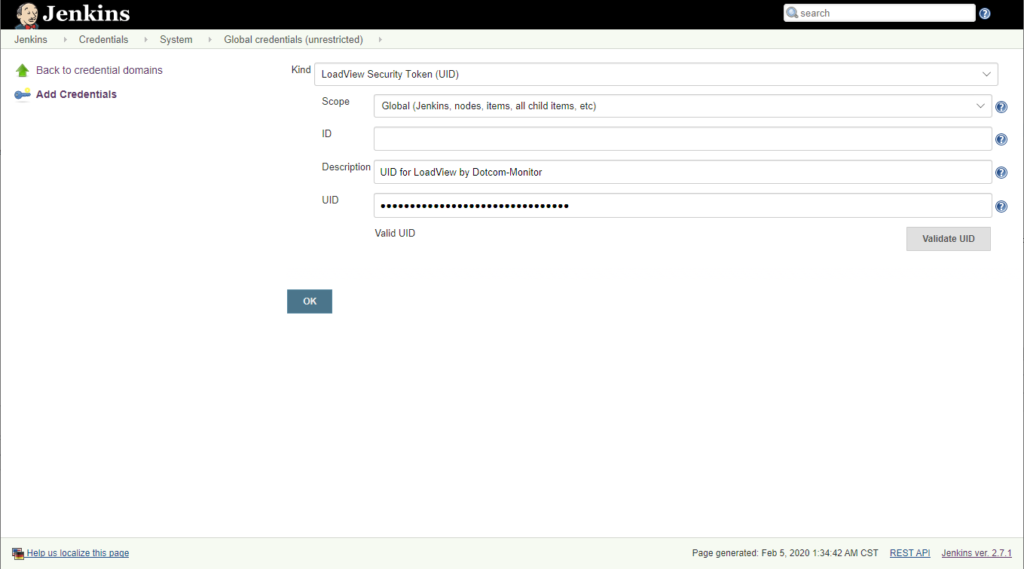
- In Jenkins, go to Credentials > Add Credentials > LoadView Security Token (UID). Configure and validate the credentials:
- Kind: LoadView Security Token (UID).
- Scope: Set as Global.
- ID: Leave the default or specify a unique ID.
- Description: Enter a unique description to set it apart from other tests.
- UID: Enter the UID from your LoadView account. Once added, select Validate UID to ensure Jenkins is accessible to the LoadView API.
3. Next, select a job and click Configure
- Go to Build > Post-build Actions > Add post-build action > LoadView-Run load test scenario. Specify LoadView Stress Test settings for the build:
- Credentials: Select the API key using the description.
- Scenario ID: Paste the test scenario ID you want to use in the build. Copy the ID from the scenario page in LoadView.
- Error Threshold: Here you can set the error threshold that is acceptable for your specific scenario. If the percentage goes over that threshold, it will be flagged as a failure within Jenkins.
- Average Time: Specify the average response time limit during the test. Like the error threshold, if the limit is exceeded, it’ll be recorded as failed in Jenkins.
- Click Save.
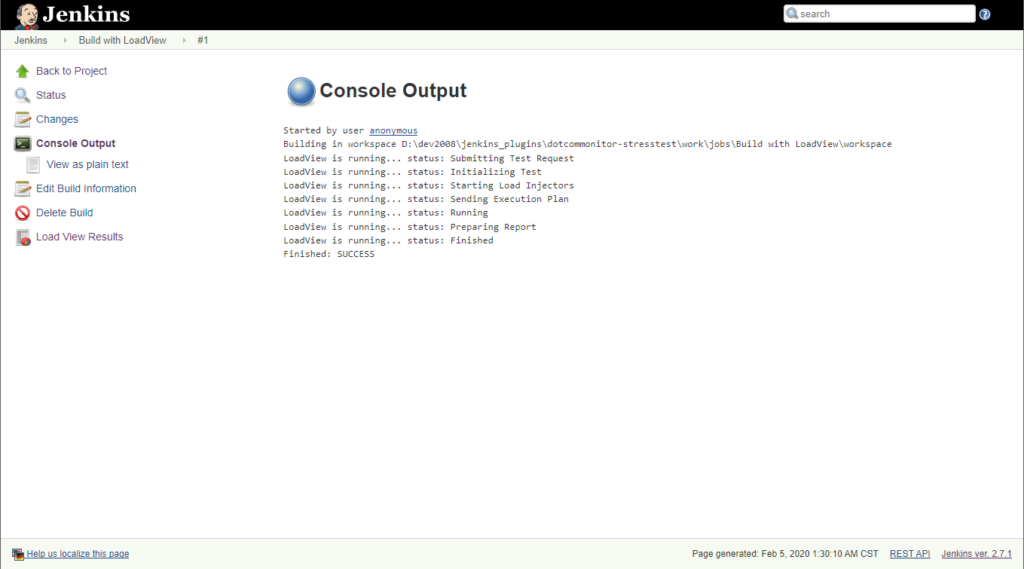
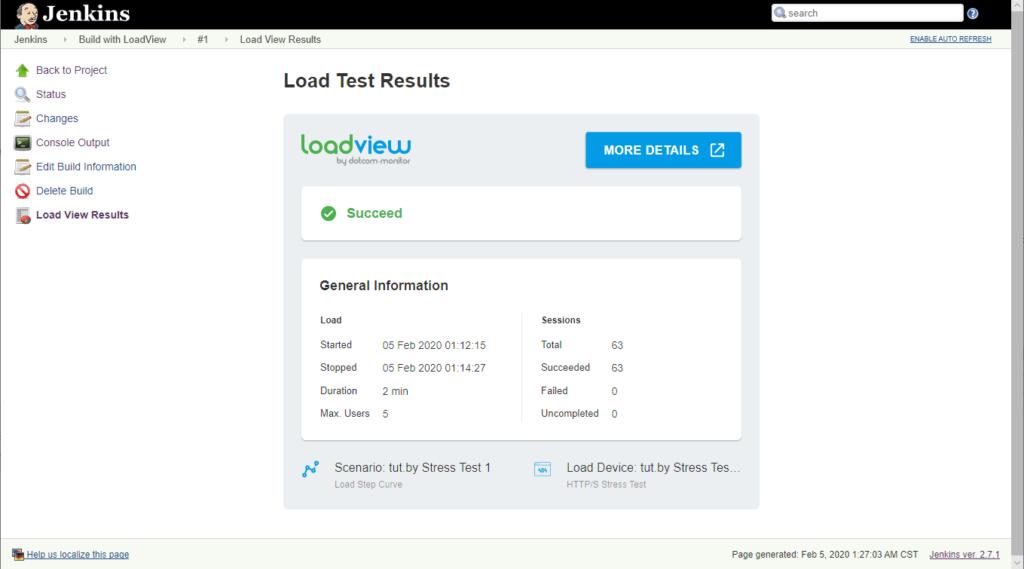
View Test Results:
When the test is running, the status is displayed, in real-time, in the Jenkins Console Output.
Wrap Up: Docker Application Load Testing
While Docker has many advantages, there can be limitations when executing load tests with heavy load, such as consuming a lot of CPU on the server, when using multiple Docker containers on the same machine, which can dramatically affect the test results. With a solution like LoadView, which can be easily integrated with CI tools like Jenkins, we’re able to create and manage load tests with thousands of concurrent connections from a fully managed cloud.
This article was a brief introduction into using Docker and Jenkins to execute cloud-based load tests. Set up a demo with one of our performance engineers to learn more about setting up test scenarios and configuring load tests with LoadView.
Try the LoadView platform today and get up to 5 free tests to get started.